Overview
Use this guide to grant Airia secure, temporary access to AWS resources in your account (for example, Amazon Bedrock models) without sharing long-lived AWS credentials.
Airia uses AWS Security Token Service (STS) AssumeRole with an External ID. You’ll create an IAM role in your AWS account that trusts Airia to assume it; Airia exchanges that trust for short-lived credentials whenever it needs to call AWS on your behalf.
Prerequisites
Before you begin, ensure you have:
Step 1: Start the connector in Airia
- In Airia, go to Settings → Ecosystem → App Connections → Available
- Choose AWS STS
- The form will display a Trust Policy and an External ID. Leave this browser tab open — you’ll need both in the next steps.
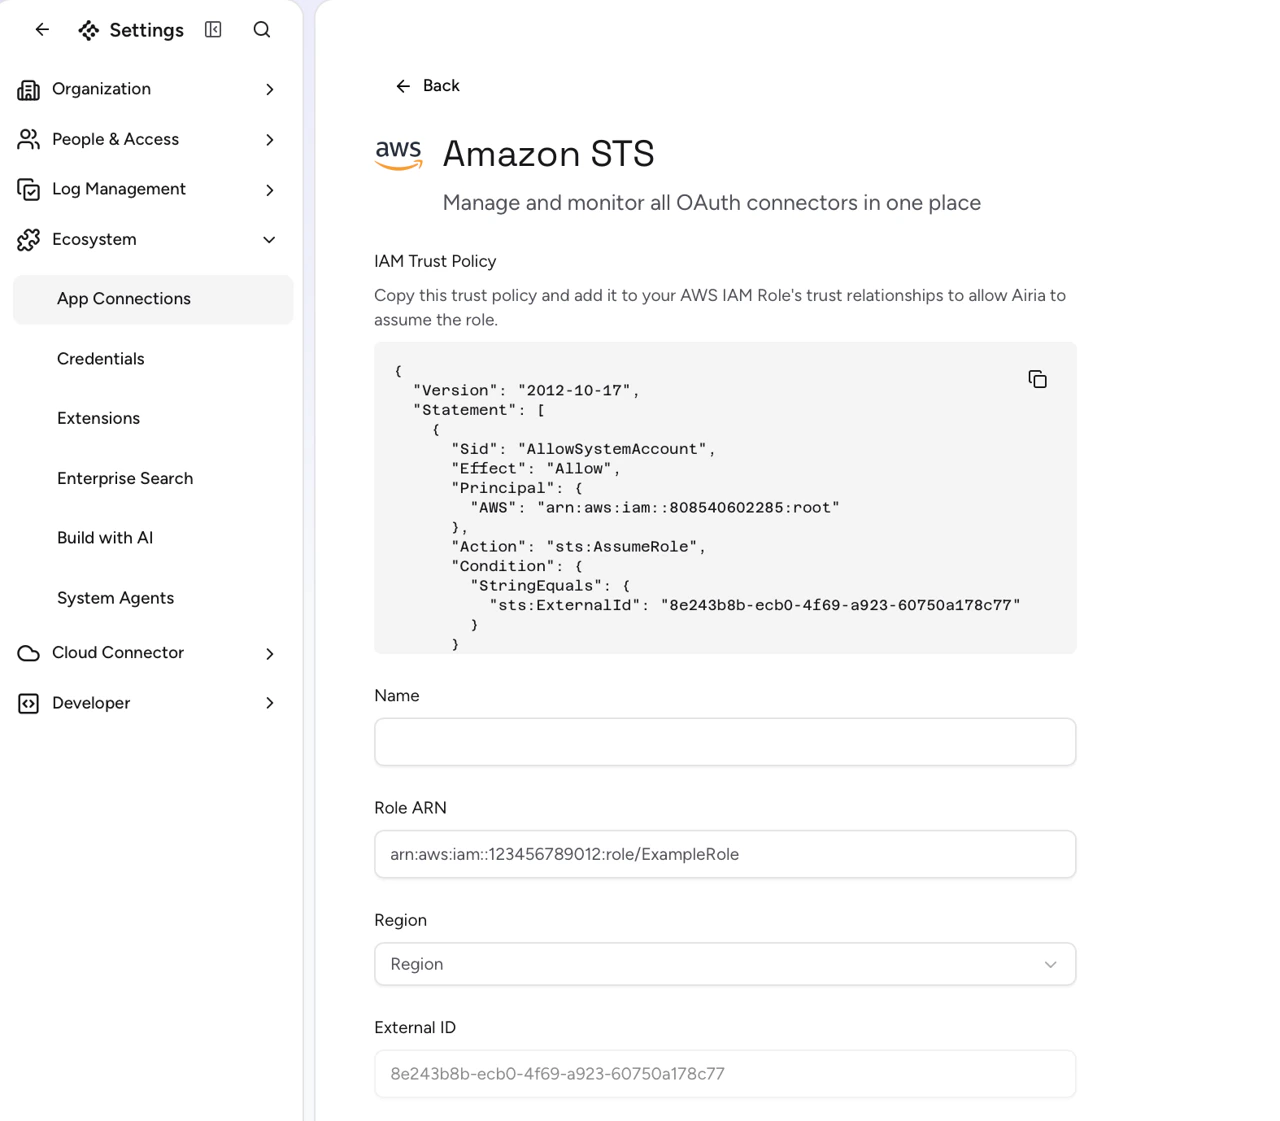
Do not refresh this page until you finish Step 4. The External ID is regenerated on each page load, and a fresh one won’t match the IAM role you’re about to create.
Step 2: Create the IAM role in AWS
- Sign in to the AWS Console and open IAM → Roles → Create role.
- Trusted entity type: select Custom trust policy.
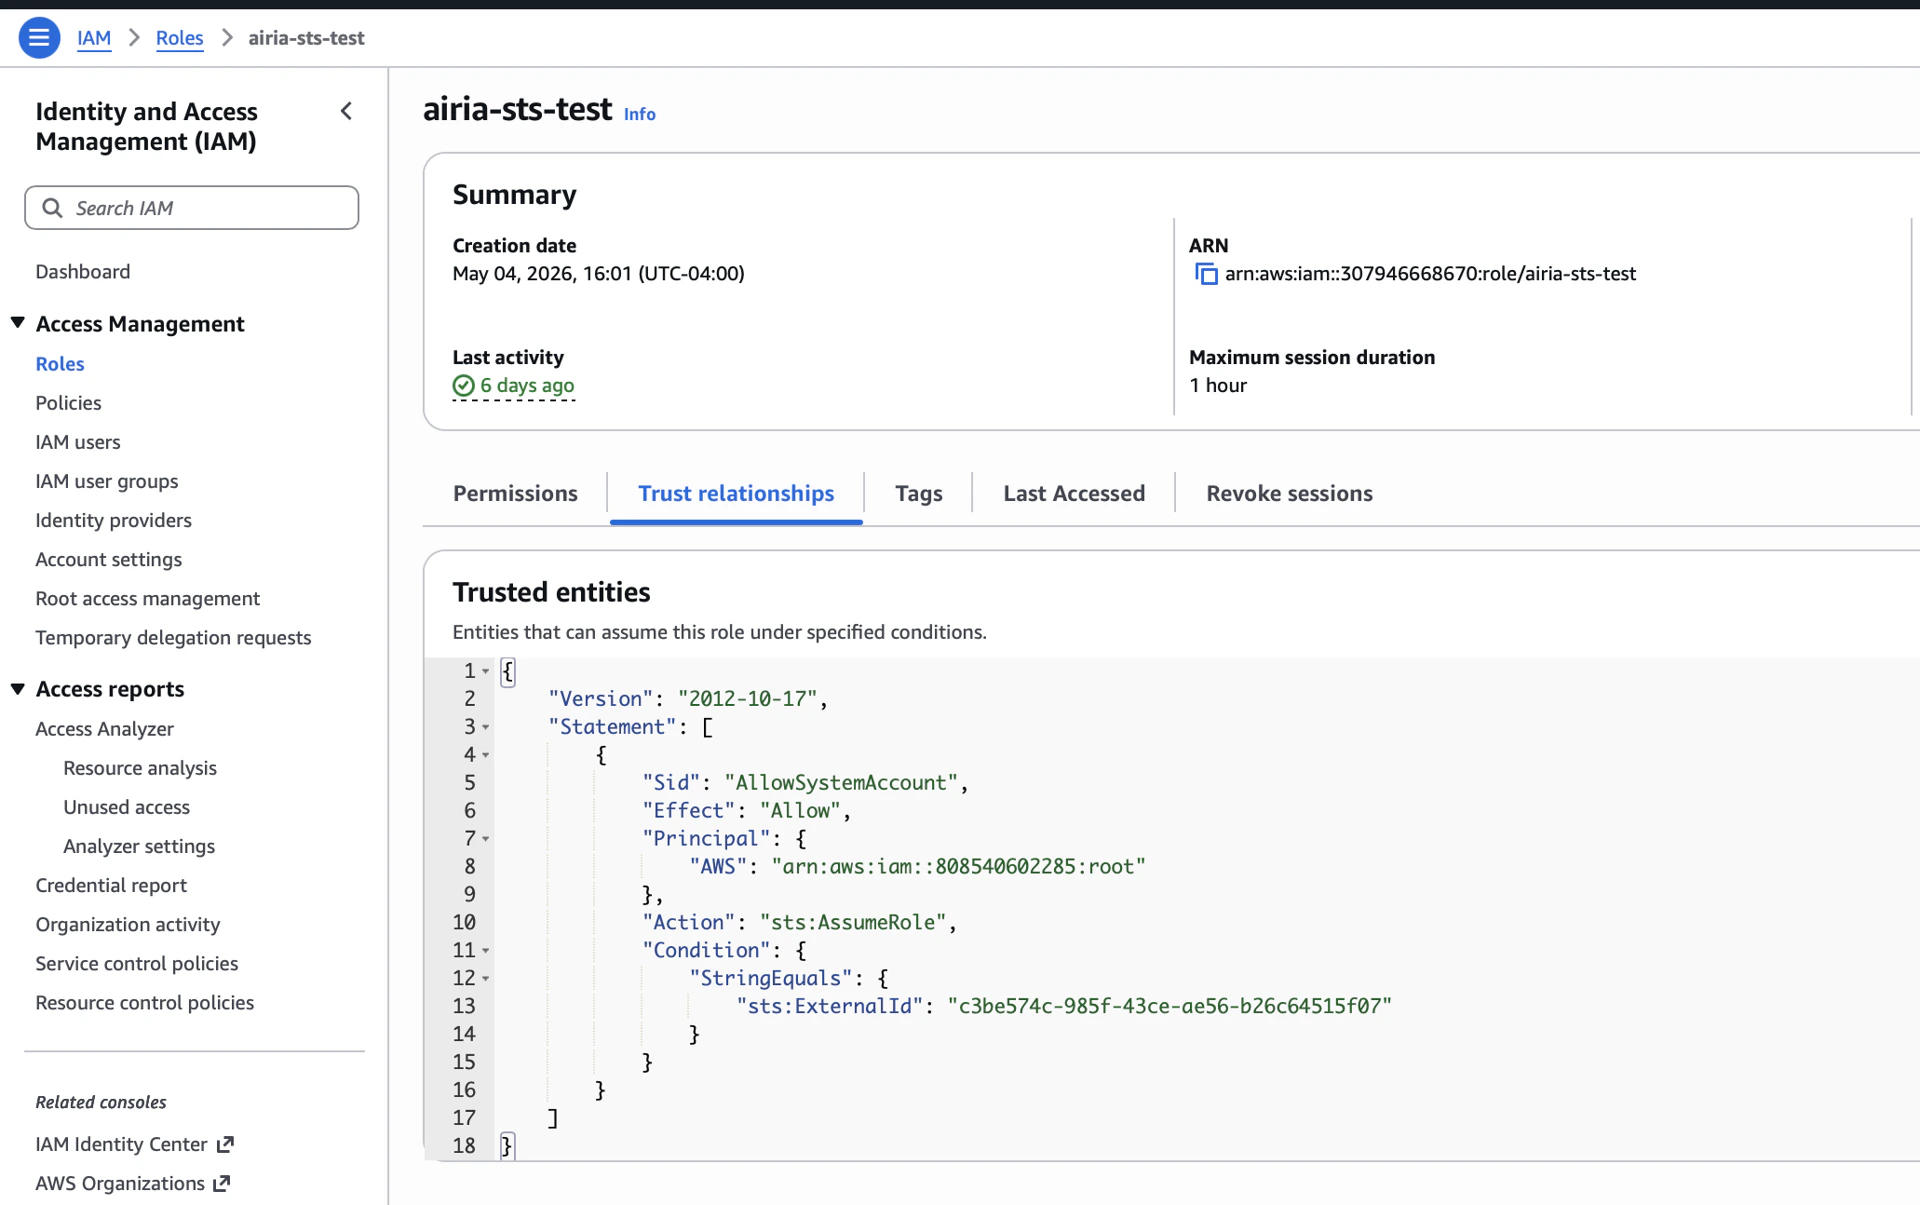
- Copy the Trust Policy from Airia and paste it into the policy editor, replacing the default JSON. It will look like:
{
  "Version": "2012-10-17",
  "Statement": [
    {
      "Sid": "AllowSystemAccount",
      "Effect": "Allow",
      "Principal": { "AWS": "arn:aws:iam::808540602285:root" },
      "Action": "sts:AssumeRole",
      "Condition": {
        "StringEquals": { "sts:ExternalId": "<your-external-id>" }
      }
    }
  ]
}
- Click Next.
Step 3: Attach permissions to the role
Grant the role only what Airia needs to do on your behalf. The most common case is invoking Bedrock models.
Bedrock (typical)
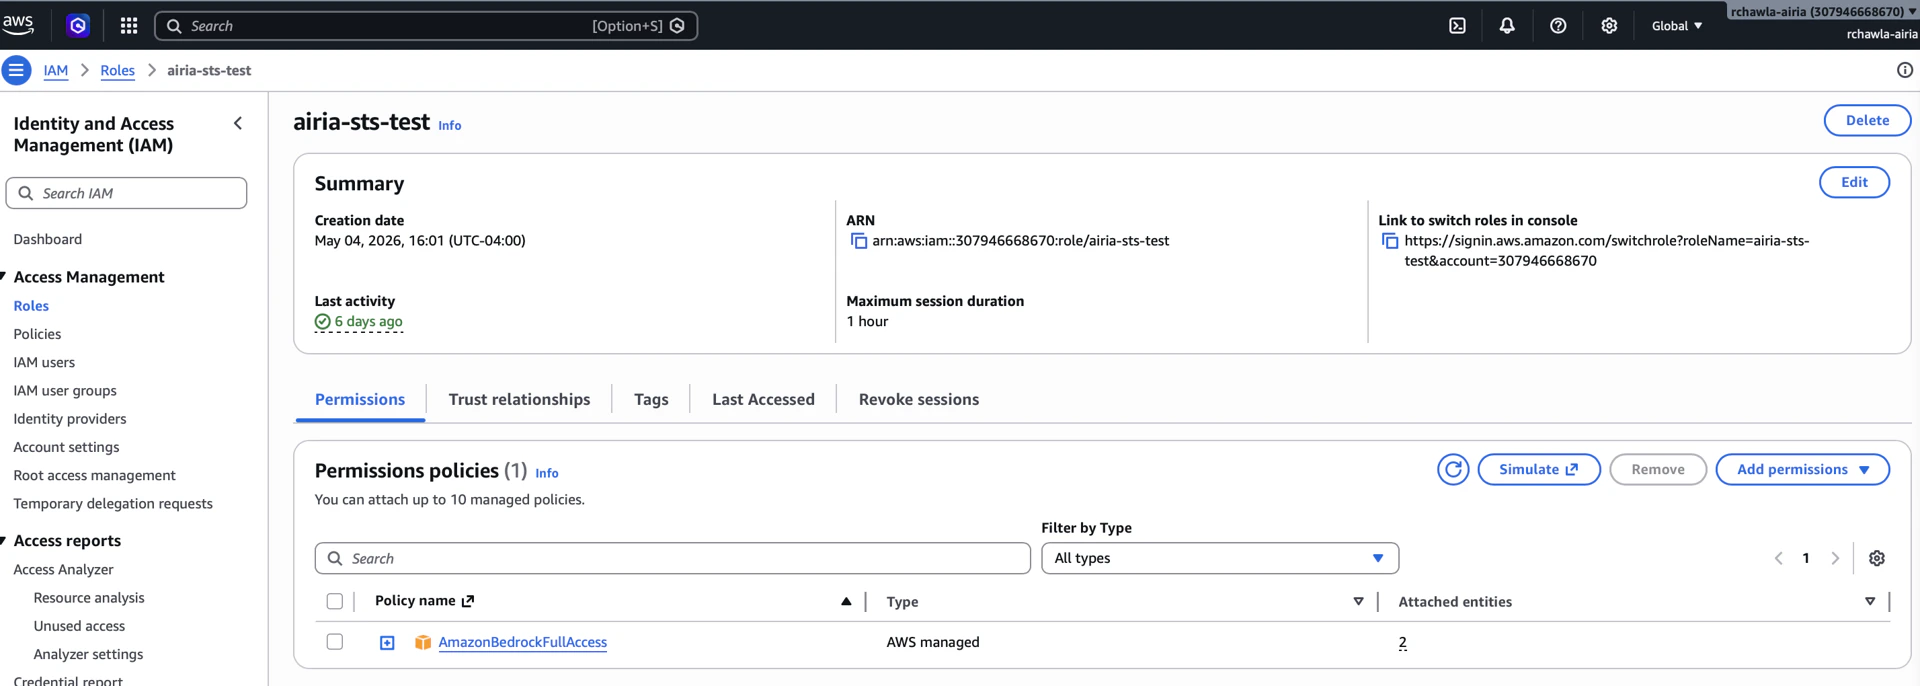
In the Add permissions step, attach the AWS-managed policy AmazonBedrockFullAccess (or create a custom policy scoped to specific model ARNs for tighter control).
Tighter scoping (recommended for production)
Create a custom policy that only allows the specific Bedrock actions and model resources you intend to expose. For example:
{
  "Version": "2012-10-17",
  "Statement": [{
    "Effect": "Allow",
    "Action": [
      "bedrock:InvokeModel",
      "bedrock:InvokeModelWithResponseStream",
      "bedrock:ListFoundationModels"
    ],
    "Resource": "*"
  }]
}
Step 4: Finish the role and copy its ARN
-
Role name: choose something descriptive, e.g.
airia-bedrock-access.
-
Click Create role.
-
Open the role you just created and copy its ARN. It will look like:
arn:aws:iam::123456789012:role/airia-bedrock-access
Step 5: Complete the connector in Airia
Back in the Airia browser tab you left open in Step 1:
- Paste the Role ARN into the Role ARN field.
- Select the Region where your AWS resources live.
- Give the connector a Name.
- Click Save.
Airia is now configured to call AWS on your behalf using temporary STS credentials.
Cross-Region Inference (for Custom models)
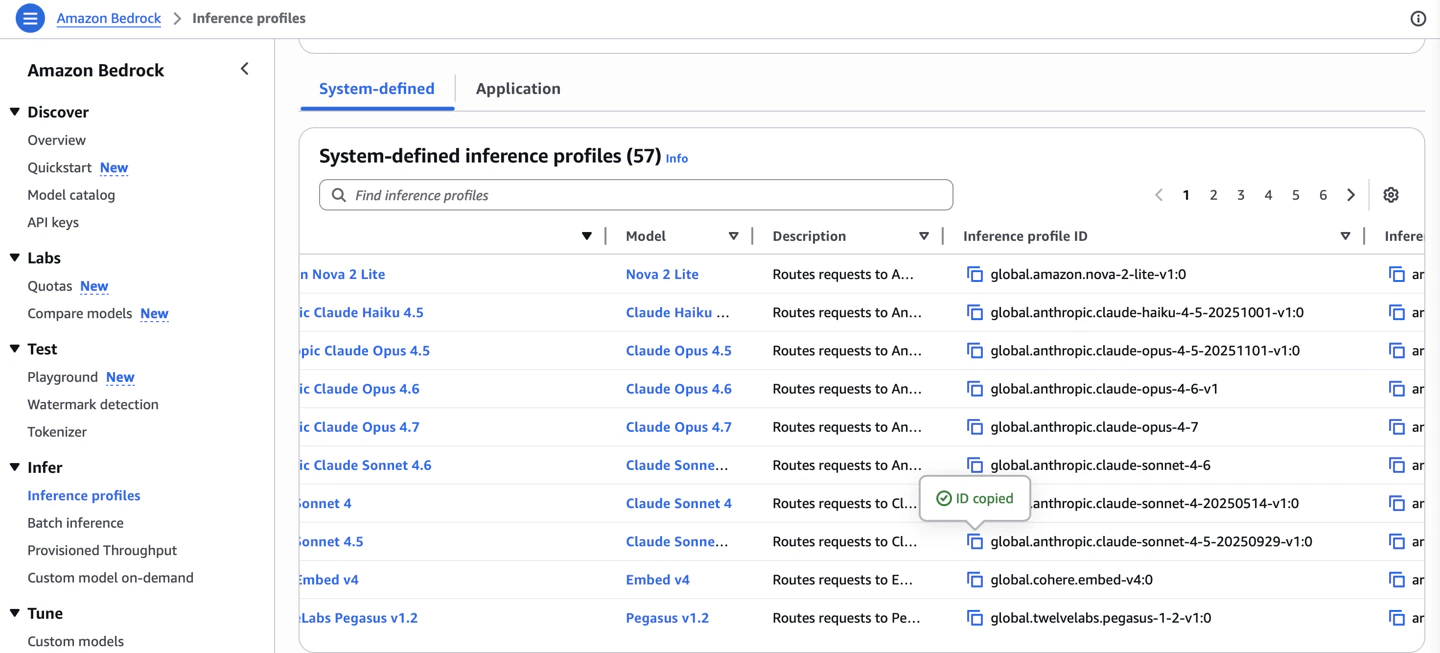
When configuring a Custom model (such as Claude or Llama), you’ll need a Cross-Region Inference ID, and copy the ID in as the Model ID on the model configuration dialog.
To find it in the Bedrock console:
- AWS Console → Amazon Bedrock (make sure you’re in your target region, e.g.
us-east-1)
- In the left sidebar, expand Infer and click Cross-region inference
- You’ll see a table of inference profiles. The column you want is Inference profile ID — that’s the value to copy into Airia.
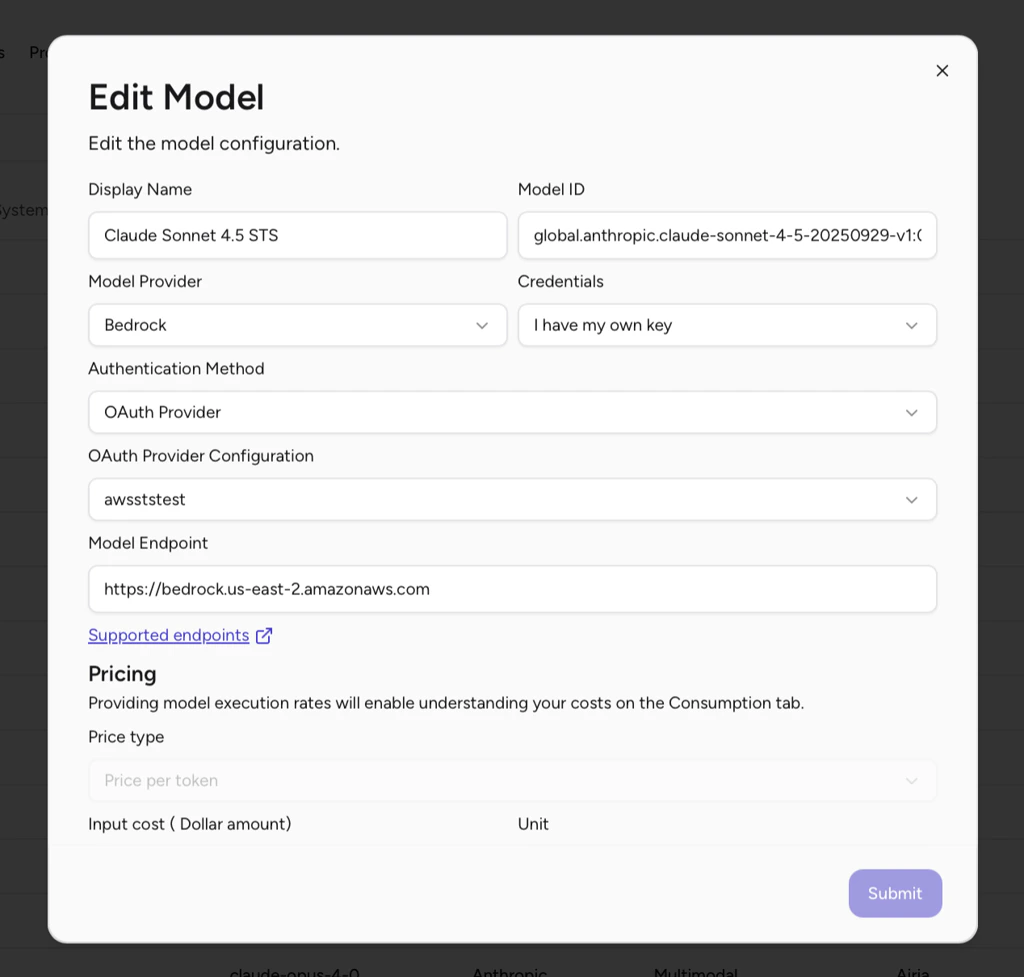
Step 6: Add it to a Model
The simplest end-to-end test is to use the connector — for example, register a Bedrock model in Model Library → Add Model, select OAuth, and pick this connector as the authentication source.
 Once saved, add the model to an Agent and send a simple greeting message. If the model responds, the end-to-end connection works.
Optional: Confirm the AssumeRole event in AWS
You can also verify the call landed in your AWS account:
-
CloudTrail → Event history (region
us-east-1), filter by Event name = AssumeRole. Look for an event with:
requestParameters.roleArn: your role’s ARNrequestParameters.externalId: the External ID Airia gave you
CloudTrail can lag 5–15 minutes.
-
IAM → Roles →
airia-bedrock-access → Last activity: updates within a few hours of use.